

Hey Fellow Creative’s,
Today I bring to you some notes and suggestions for creating your very own bullet journal. I too am new to this, but rest assured, with a little planning and patience you too, can design a very simple and manageable planner for your daily life and projects.
Let’s get right to it…
- Choosing a Notebook:
This is probably the most daunting part if you have an issue (or pet peeve like I do) with ink bleeding or ghosting. Upon my research the Letchum is probably the most efficient if you’re ok with spending 20 bucks. To my surprise, Moleskin had the worst reviews due to bleeding and ghosting. But in my opinion… if you’re spending 20 bucks on a journal it needs to have high quality paper. But since I’m pretty “thrifty” I picked up an Artist Loft dotted journal from Michales for 5 bucks. Now it too bleeds and ghosts depending on the types of pens you use BUT I read in a review that this chick used a glue stick to glue her pages together. Now I don’t know about you, but I’d rather glue $5 pages together, than 20 dollar ones. Plus, there are more pages in the Artist loft journal and I love the dimensions.
But of course whatever journal you choose, as long as it has some sort of grid will do just fine.
(Update: the bleeding in the artist loft journal hasn’t been so bad that I felt the need to glue my pages together. I’ll touch more on this under which pens to use.)

- Graph Paper:
After jumping right into my artist loft journal of course I was disappointed to see how the pens I was using left major ghost lines. So my OCD led me to purchase another one and keep the one I messed up in as a draft journal. But instead of buying two journals, especially if you chose an expensive one, find some graph paper to practice layouts, test inking, and organize your ideas.
- Layout:
 Now is the time to brainstorm any of the elements that you will need in your bullet journal. Take a scratch piece of paper and jot down any elements that you’ll need from a yearly, monthly, weekly and or daily spread that will help you achieve the task and goals that are significant to you. Would you prefer a weekly habit tracker or a monthly habit tracker? Do you feel the need to have a monthly view with space to take notes or something simple with just the numbers and days of the week? This is your personal planner and you can design it anyway you wish. No one has to see it, it doesn’t need to be perfect, just let it be you.
This is also a great time to use the suggested graph paper to determine how much space you will need to draw out your layouts. Of course you can do this with pencil, very lightly in your book, but it helps to also test which size ink pens you may want to use for specific design elements.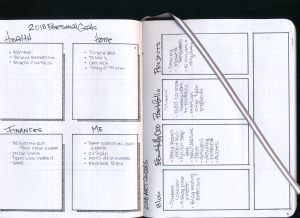
Don’t let this part of the process intimidate you; there are tons of examples on pintrest to choose from. Just choose which elements appeal to you the most and try drafting them out on your graph paper. The goal isn’t to have some elaborate, fancy planner but to create a simple layout for you thoughts, goals and plans. So do not stress about the artistic elements. Considering this is my first bullet journal, I focused more on simplicity.
- Test inks:
As I noted above, I jumped right in when I got the bright idea to try bullet journaling. Little did I know, I was going to mess up my book. So I suggest testing inks in the very back of your book.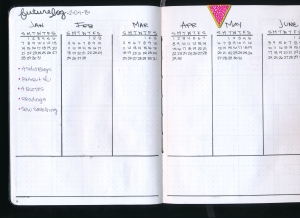
So far Micron’s have not been bleeding or (very minimal) ghosting, and are water proof. (I tend to get sweaty palms which means smudges so water proof pens are a msut.) I suggest a 08 for borders and finer pens like 01 and 02 for writing within dots or grids. I also use regular ball point pens and gel G-2 07 Pilot pens to avoid further bleeding or ghosting.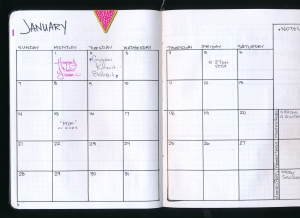
- And most importantly have fun and a bit of patience.
The more impatient I become or try to rush through the process the more mistakes I make. I draw everything out in pencil and check it twice before I start to ink. Of course mistakes are unavoidable but that’s why it is so important to spend the time developing your layout so that when it’s complete it becomes an effective tool for organizing your goals, projects and daily life.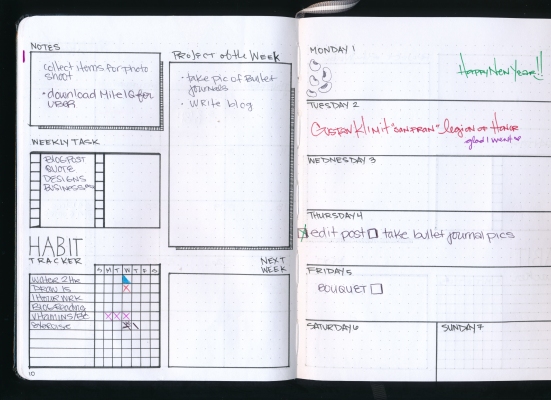
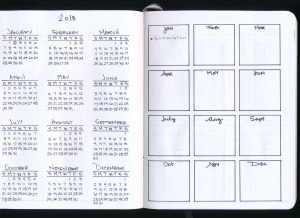
So far my bullet journal includes a yearly overview with a notes section and a page for my personal goals and “art” goals. I’ve also included a 6 month future log followed by a monthly layout that has enough space for notes. Next there is a weekly two page layout that breaks down my goals for the week, projects that I need to work on and a tracker for habits I need to work on.
Here are a few more links to some video’s I found extremely helpful:
https://www.youtube.com/watch?v=C-f62ncQBWM&t=27s
https://www.youtube.com/watch?v=Urs2Xs6QdpQ&t=475s
https://www.youtube.com/watch?v=FtQBs8PB19I
